Migrate from svn to git
Mon, Apr 2, 2012
Subversion was the most used versioning system until last year. A majority of new projects are now using git and most of the older but active project are now migrating from subversion to git.
This tutorial will show you how to migrate your subversion server (online hosted or using a software like visualsvn server) to a git server (GitStack).
The migration process has 4 steps :
1. Use git to checkout your svn repository
2. Clean your project from unnecessary files
3. Create a new remote git repository on GitStack
4. Push your repository to GitStack
Prerequisites :
-msysgit installed on a client computer
-GitStack installed on a remote computer
We take as our svn repository example “fotoslide” which is a project randomly chosen on google code http://code.google.com/p/fotoslide/
Launch git bash (provided by msysgit)

Checkout your svn project on your client computer :
$ git svn clone http://fotoslide.googlecode.com/svn/ –no-metadata -s fotoslide
Git will download all the repository files and history. It might take a few minutes/hours depending of the size of your svn repository. The ‘–no-metadata’ parameter is used to remove unnecessary svn backward compatibility data (git-svn-id is not imported).

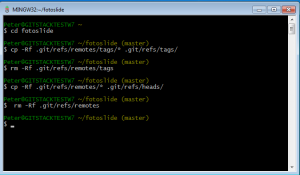
Get into your project directory :
$ cd fotoslide
Convert weird tag branches to real git tags :
$ cp -Rf .git/refs/remotes/tags/* .git/refs/tags/
$ rm -Rf .git/refs/remotes/tags
Convert old svn branches to real git branches :
$ cp -Rf .git/refs/remotes/* .git/refs/heads/
$ rm -Rf .git/refs/remotes

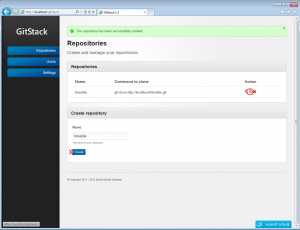
Launch GitStack on your server and create one user
Create a repository. We will name it fotoslide.
Add a user with read/write access to the repository.


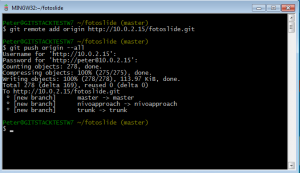
Add the git server as a remote server :
$ git remote add origin http://10.0.2.15/fotoslide.git
Push your code to the new server, including all the tags and branches :
$ git push origin –all

You have successfully migrated your repository from svn to git.

This tutorial will show you how to migrate your subversion server (online hosted or using a software like visualsvn server) to a git server (GitStack).
The migration process has 4 steps :
1. Use git to checkout your svn repository
2. Clean your project from unnecessary files
3. Create a new remote git repository on GitStack
4. Push your repository to GitStack
Prerequisites :
-msysgit installed on a client computer
-GitStack installed on a remote computer
1. Use git to checkout your svn repository
We take as our svn repository example “fotoslide” which is a project randomly chosen on google code http://code.google.com/p/fotoslide/
Launch git bash (provided by msysgit)

Checkout your svn project on your client computer :
$ git svn clone http://fotoslide.googlecode.com/svn/ –no-metadata -s fotoslide
Git will download all the repository files and history. It might take a few minutes/hours depending of the size of your svn repository. The ‘–no-metadata’ parameter is used to remove unnecessary svn backward compatibility data (git-svn-id is not imported).

2. Clean your project from unnecessary files
Get into your project directory :
$ cd fotoslide
Convert weird tag branches to real git tags :
$ cp -Rf .git/refs/remotes/tags/* .git/refs/tags/
$ rm -Rf .git/refs/remotes/tags
Convert old svn branches to real git branches :
$ cp -Rf .git/refs/remotes/* .git/refs/heads/
$ rm -Rf .git/refs/remotes

3. Create a new remote git repository on GitStack
Launch GitStack on your server and create one user
Create a repository. We will name it fotoslide.
Add a user with read/write access to the repository.


4. Push your repository to GitStack
Add the git server as a remote server :
$ git remote add origin http://10.0.2.15/fotoslide.git
Push your code to the new server, including all the tags and branches :
$ git push origin –all

You have successfully migrated your repository from svn to git.

